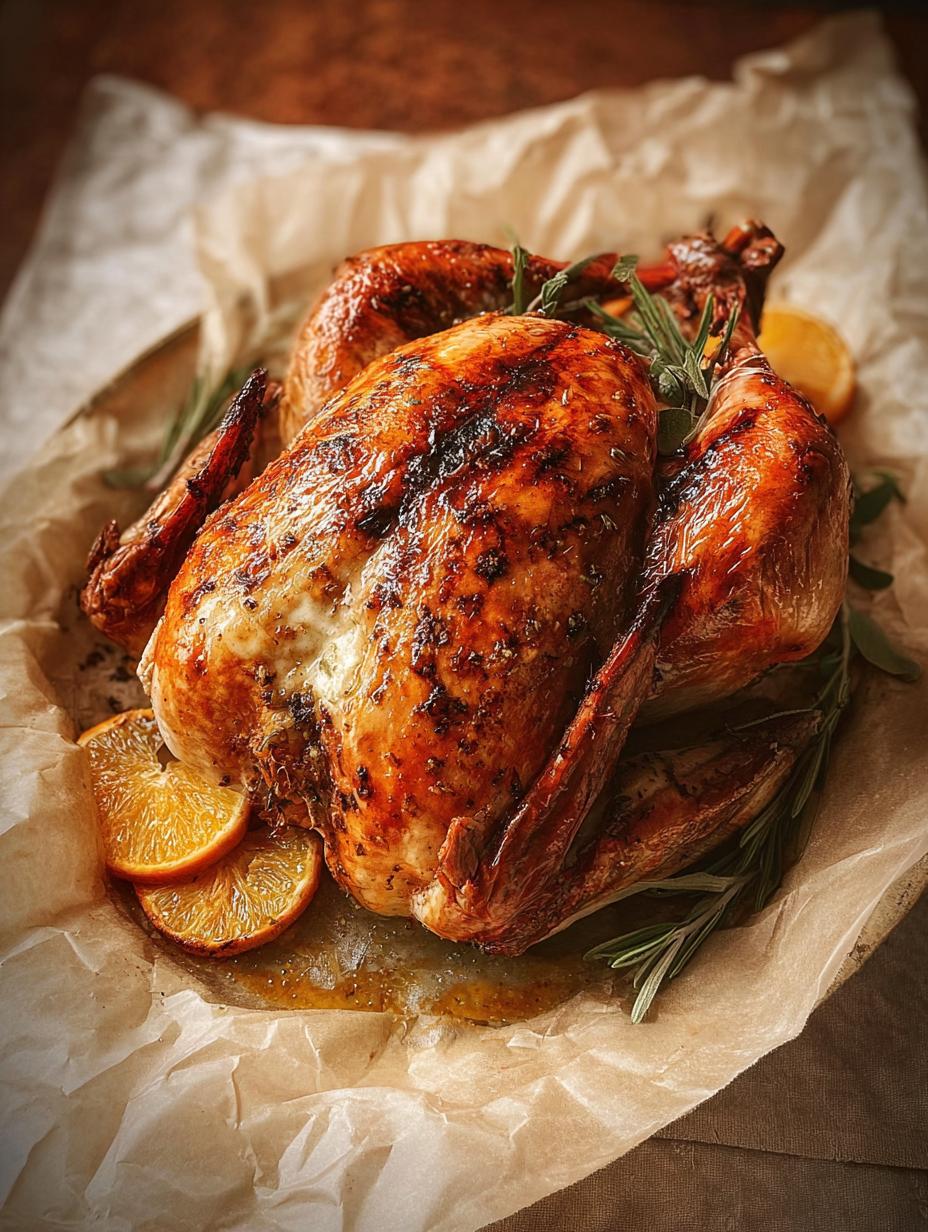
Turkey Brine has been my secret weapon for Thanksgiving dinner ever since I nearly ruined my first holiday bird. I remember watching my grandmother effortlessly pull a golden, succulent turkey from the oven, and mine always came out dry. That’s when she shared her wisdom: a proper homemade turkey brine. The first time I tried it, the aroma of herbs and citrus filled my kitchen, promising something special. When we carved into that juicy bird, it was a revelation – tender, flavorful, and moist from the inside out. Now, I wouldn’t dream of making a holiday turkey without this incredible brining solution for turkey. It truly transforms an ordinary bird into an extraordinary centerpiece. Let’s get cooking!
Why You’ll Love This Turkey Brine
I promise, this simple addition to your holiday routine will change your turkey game forever. Here’s why I know you’ll adore this recipe:
- It guarantees an incredibly flavorful turkey, infused with aromatic herbs and spices.
- This juicy turkey brine ensures your bird stays moist and tender, even if you accidentally overcook it slightly.
- The prep time is minimal, mostly hands-off, allowing you to focus on other holiday dishes.
- Say goodbye to dry, bland turkey; this method locks in moisture and boosts taste significantly.
- You’ll achieve competition-worthy results right in your own kitchen with this easy turkey brine.
- It’s a budget-friendly way to elevate your meal, using common ingredients for a spectacular outcome.
- Your family and guests will rave about the succulence and rich taste of your holiday turkey.
- This juicy turkey brine is the secret to a stress-free Thanksgiving, resulting in a perfectly cooked bird every time.
Ingredients for Your Homemade Turkey Brine
Gathering the right turkey brining ingredients is step one to a truly unforgettable holiday bird. I’ve carefully selected each component for its ability to infuse flavor and moisture, ensuring your turkey is the star of the show. Here’s what you’ll need for this fantastic turkey brine:
- 1 gallon vegetable broth – This provides a flavorful base, much better than just water, and helps carry the other flavors deep into the turkey.
- 1 cup kosher salt – Essential for the brining process, it helps the turkey retain moisture. Make sure it’s kosher for best results.
- ½ cup light brown sugar – Balances the saltiness and adds a subtle sweetness and beautiful caramelization to the skin.
- 1 tablespoon black peppercorns – Adds a gentle, earthy spice that complements the other aromatics.
- 1 ½ teaspoons allspice berries – These little berries bring warm, complex notes, reminiscent of cloves, cinnamon, and nutmeg.
- 1 bunch fresh sage – A classic turkey pairing, sage offers a robust, earthy aroma that screams “holiday.”
- 1 bunch fresh thyme – Thyme contributes a delicate, savory, and slightly lemony note to our turkey brine.
- 1 large orange, quartered – The citrus brightens the flavor profile and adds a lovely fragrant zest.
- 6 cloves garlic, smashed – Garlic is a must for deep, savory flavor; smashing it helps release its oils.
- 1 gallon ice water – Crucial for cooling down the hot brine quickly before adding your turkey.
- 1 (12-14 pound) turkey, thawed – The star of our show, ready to be transformed!
How to Make Turkey Brine
Making your own turkey brine is simpler than you might think, and it’s the key to unlocking an incredibly juicy and flavorful turkey. I’ve broken down the steps into an easy-to-follow process, ensuring your holiday bird is nothing short of spectacular. This wet brine for turkey will truly make a difference.
- Step 1: In a very large stockpot, combine the vegetable broth, kosher salt, light brown sugar, black peppercorns, allspice berries, fresh sage, fresh thyme, orange quarters, and smashed garlic cloves. I love how the kitchen begins to smell amazing at this point!
- Step 2: Place the stockpot over high heat and bring the mixture to a rolling boil. Stir continuously until you see that the kosher salt and brown sugar have completely dissolved into the liquid. This ensures all the flavors are well-integrated into your turkey brine.
- Step 3: Once boiling and dissolved, immediately remove the brine from the heat. This step is critical; you absolutely must let the brine cool down completely before it touches your turkey. I usually let it sit on the counter for an hour or so, then transfer it to the fridge to chill thoroughly.
- Step 4: After the brine has cooled to room temperature or colder, stir in the 1 gallon of ice water. This rapid cooling helps bring the temperature down safely and quickly, creating the perfect environment for your wet brine for turkey.
- Step 5: Now it’s time for the turkey! Carefully place your thawed 12-14 pound turkey into a large brining bag or a clean, food-safe container. Ensure the container is big enough to fully submerge the turkey.
- Step 6: Pour the completely cooled turkey brine over the turkey. Make sure the entire bird is submerged. If a small part of the turkey isn’t covered, you can add a little extra water to ensure full submersion.
- Step 7: Seal the brining bag securely or cover your container tightly with a lid or plastic wrap. Transfer it to the refrigerator and let the turkey brine for 12 to 24 hours. For a truly juicy turkey, I’ve found that 18-20 hours is my sweet spot, but never go beyond 24 hours, or it can become too salty.
- Step 8: When your brining time is up, carefully remove the turkey from the brine. Discard the used brining solution immediately. It’s important to pat the turkey thoroughly dry, inside and out, with paper towels. This helps achieve that beautiful, crispy skin we all love on a roasted turkey.
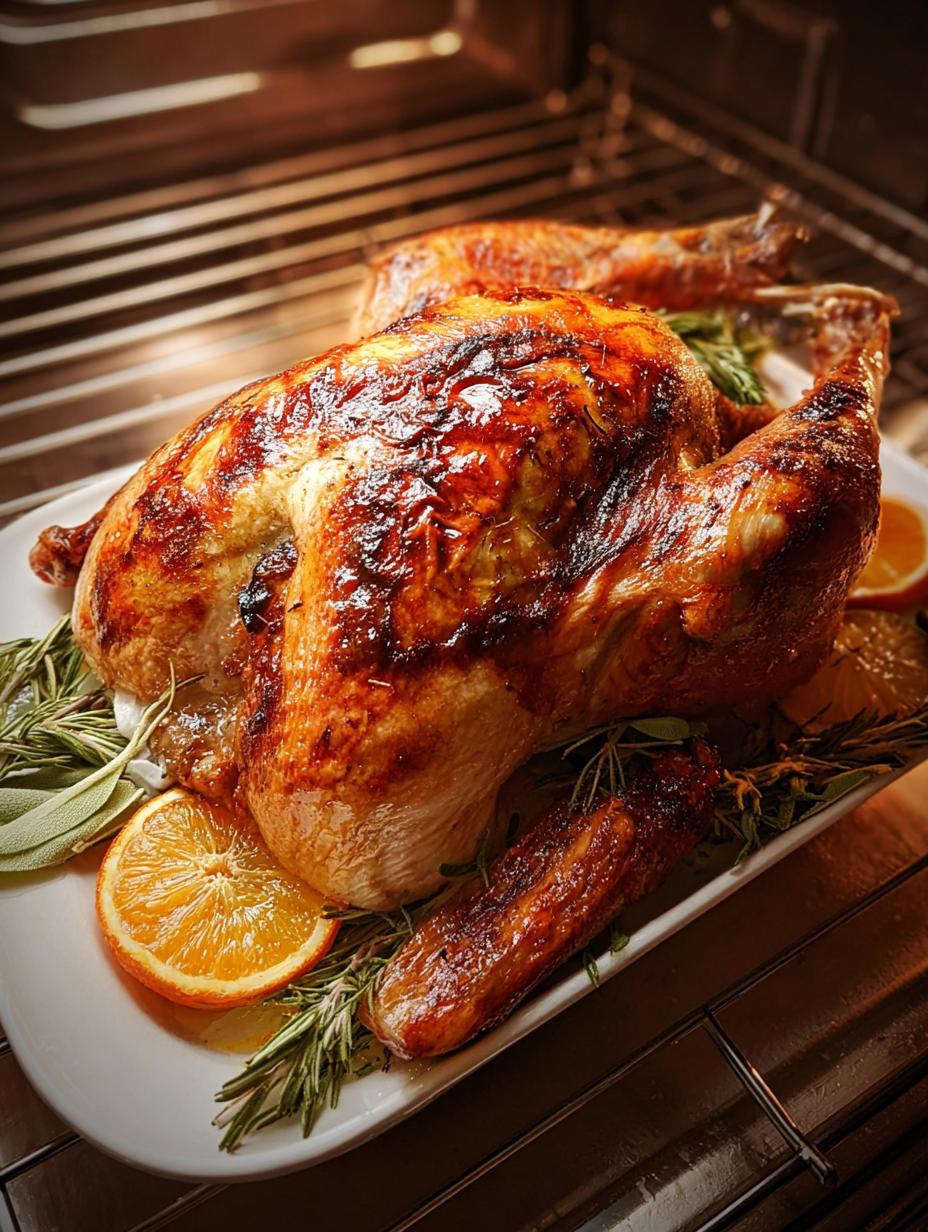
- Step 9: Your turkey is now ready for roasting! Proceed with your favorite turkey roasting method, confident that you’re about to enjoy the most flavorful and moist turkey you’ve ever made.
Pro Tips for the Best Turkey Brine
Over the years, I’ve picked up a few tricks that make all the difference when preparing the best turkey brine. These simple tips will elevate your brining game and ensure your holiday bird is a showstopper. Trust me, these small efforts yield huge results for a truly juicy turkey.
- Always ensure your brine is completely chilled before adding the turkey to prevent any premature cooking.
- Use a food-grade container or brining bag that’s large enough to fully submerge the turkey without spillage.
- Do not over-brine; sticking to the recommended 12-24 hours is crucial for perfect flavor and texture.
- Patting the turkey thoroughly dry after brining is essential for achieving that coveted crispy skin.
- Consider placing the brining container in a cooler with ice packs if fridge space is an issue, ensuring it stays below 40°F (4°C).
What’s the secret to perfect turkey brine?
The real secret to a perfect and flavorful turkey brine lies in the balance of salt, sugar, and aromatics, combined with proper cooling. Allowing the brine to infuse and cool completely before introducing the turkey ensures maximum flavor absorption without cooking the meat. This creates a superior brining solution for turkey.
Can I make this turkey brine ahead of time?
Absolutely! I often make my turkey brine 2-3 days in advance. Just prepare the brine as instructed, let it cool completely, and then store it in a sealed container in the refrigerator. This frees up valuable time on the day you plan to brine your turkey.
How do I avoid common mistakes with turkey brining?
To avoid common mistakes with turkey brining, never add a warm brine to your turkey, as this can lead to food safety issues. Also, avoid over-brining; sticking to the 12-24 hour window prevents your turkey from becoming too salty. Lastly, always pat the turkey dry after brining for crispy skin.
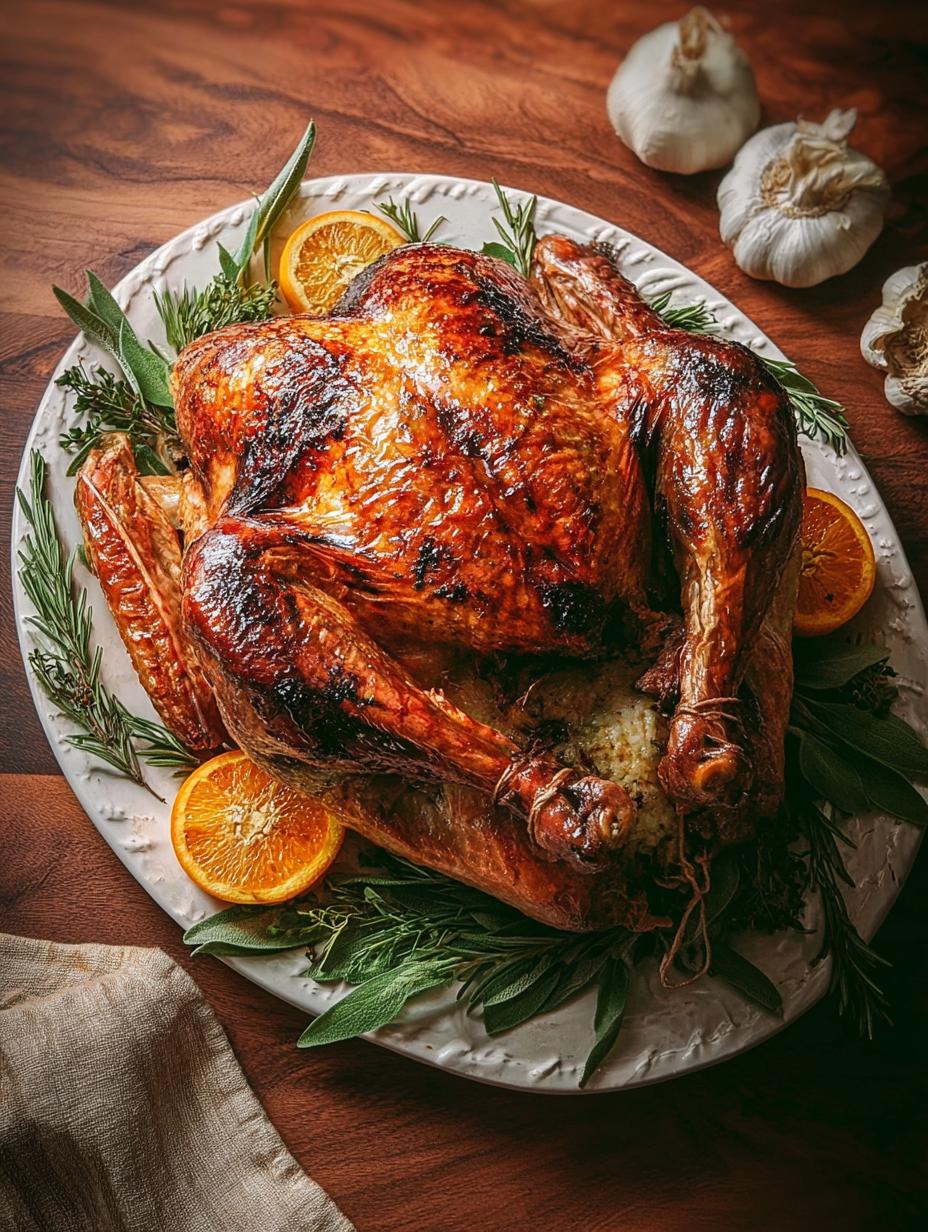
Best Ways to Serve a Brined Turkey
After all the effort you’ve put into creating the perfect turkey brine, it’s time to enjoy the fruits of your labor! A perfectly brined and roasted turkey is truly a feast for the senses. I love presenting it as the centerpiece of my holiday table, surrounded by classic, comforting side dishes.
For me, the ideal pairing with this succulent bird starts with a rich, savory gravy made from the pan drippings. A vibrant cranberry sauce adds a touch of sweetness and tartness that perfectly complements the rich flavors developed by the brine for roasted turkey. Don’t forget hearty sides like creamy mashed potatoes, savory stuffing infused with herbs, and roasted seasonal vegetables such as Brussels sprouts or green bean casserole. The beauty of a well-brined turkey is its versatility, making it the star of any traditional holiday meal.
Nutrition Facts for Turkey Brine
Understanding the nutritional impact of your holiday meal is always helpful. While the exact values can vary, here are the estimated nutrition facts per serving for turkey prepared with this fantastic turkey brine recipe (based on approximately 4 oz of cooked turkey).
- Serving Size: 1 serving (approx. 4 oz cooked turkey)
- Calories: 250
- Protein: 30g
- Fat: 12g
- Saturated Fat: 3g
- Unsaturated Fat: 8g
- Trans Fat: 0g
- Carbohydrates: 6g
- Fiber: 1g
- Sugar: 5g
- Sodium: 600mg
- Cholesterol: 80mg
Nutritional values are estimates and may vary based on specific ingredients used, the size of your turkey, and cooking methods. This turkey brine enhances flavor without adding significant calories.
How to Store and Reheat Brined Turkey
After all the hard work of brining and roasting, you’ll want to ensure your delicious turkey leftovers are stored and reheated properly. I always aim to make the most of my holiday feast, and knowing how to handle the leftovers from a perfectly brined bird is key. This also ties into understanding how long to brine a turkey, as proper brining contributes to better texture and moisture retention even after reheating.
First, allow any leftover turkey to cool completely at room temperature for no more than two hours. Then, carve the meat off the bones and store it in airtight containers or tightly wrapped in foil. It will stay fresh in the refrigerator for 3-4 days. For longer storage, you can freeze cooked turkey for up to 3 months. When reheating, I like to add a splash of broth to prevent dryness and warm it gently in the oven at 300°F (150°C) or in the microwave until heated through. This ensures your turkey remains juicy and flavorful, extending the joy of your holiday meal.
Frequently Asked Questions About Turkey Brine
Why brine a turkey for Thanksgiving?
I often get asked, “Why brine a turkey at all?” The simple answer is moisture and flavor! Brining helps the turkey retain moisture during cooking, preventing that dreaded dry, bland bird. It also infuses the meat with delicious flavors from the herbs and spices in the brining solution, making your Thanksgiving centerpiece truly unforgettable. It’s the best way to ensure a juicy and tender result.
Do I need special equipment for turkey brining?
Not necessarily! While specialized brining bags exist, I’ve successfully used a large, food-grade bucket or even a clean cooler lined with a heavy-duty trash bag (unscented, of course!). The most important thing is having a container large enough to fully submerge your turkey and fit in your refrigerator or a cold spot. A basic stockpot for making the turkey brine is all you really need.
Can I use a frozen turkey for brining?
You can, but it needs to be completely thawed first. Never brine a frozen or partially frozen turkey. The brining solution won’t penetrate properly, and it can also be a food safety risk. Plan ahead and allow ample time for your turkey to thaw in the refrigerator before you even think about starting your turkey brine process.
Does brining make the turkey too salty?
This is a common concern! If done correctly, your turkey should not be overly salty. The key is to stick to the recommended brining times—12 to 24 hours for this recipe. Over-brining can indeed make the turkey too salty. Also, make sure to rinse the turkey well and pat it completely dry before roasting to remove any excess surface salt from the turkey brine.
Variations of Turkey Brine You Can Try
While my classic turkey brine recipe is a winner, I love experimenting with variations to suit different tastes or dietary needs. Exploring different approaches keeps things exciting and allows you to tailor your holiday bird perfectly. Here are a few ideas to inspire your next brining adventure, including the popular debate of dry brine vs wet brine turkey.
- Citrus Herb Brine: Amp up the brightness by adding extra lemon, lime, and orange slices, along with more fresh rosemary and thyme. This creates a wonderfully aromatic and zesty flavor profile.
- Spicy Southwestern Brine: For a kick, incorporate dried chilies like ancho or chipotle, a tablespoon of cumin, and a bay leaf or two. It adds a smoky, warm depth that’s fantastic with roasted root vegetables.
- Maple Apple Brine: Swap out half of the brown sugar for pure maple syrup and add a few sliced apples to the brine mixture. This provides a lovely sweetness and autumnal flavor.
- Dry Brine: If you prefer a less messy method or struggle with refrigerator space, consider a dry brine. Instead of submerging the turkey in liquid, you rub a salt, sugar, and spice mixture directly onto the bird’s skin and refrigerate it. This is a great alternative to a wet brine for turkey, often praised for delivering incredibly crispy skin and concentrated flavor, though it works a bit differently than a traditional turkey brine.

Amazing Turkey Brine: 1 Secret for a Juicy Bird
- Total Time: 12 hours 30 minutes
- Yield: 1 (12-14 pound) turkey 1x
- Diet: Halal
Description
This turkey brine recipe ensures a juicy and flavorful turkey. It transforms dry or bland turkey into a holiday centerpiece. Prepare to make your turkey the star of the feast with this easy homemade turkey brine.
Ingredients
- 1 gallon vegetable broth
- 1 cup kosher salt
- ½ cup light brown sugar
- 1 tablespoon black peppercorns
- 1 ½ teaspoons allspice berries
- 1 bunch fresh sage
- 1 bunch fresh thyme
- 1 large orange, quartered
- 6 cloves garlic, smashed
- 1 gallon ice water
- 1 (12-14 pound) turkey, thawed
Instructions
- Combine vegetable broth, kosher salt, brown sugar, peppercorns, allspice berries, sage, thyme, orange quarters, and smashed garlic in a large stockpot.
- Bring the mixture to a boil over high heat, stirring until the salt and sugar dissolve.
- Remove the brine from the heat and let it cool completely. This cooling step is crucial for the best turkey brine.
- Once cooled, stir in the ice water. This creates the perfect brining solution for turkey.
- Place your thawed 12-14 pound turkey into a large brining bag or a clean, food-safe container.
- Pour the cooled turkey brine over the turkey, ensuring it is fully submerged. If needed, add more water to cover the turkey completely.
- Seal the bag or cover the container and refrigerate for 12 to 24 hours. For a truly juicy turkey, do not brine for longer than 24 hours.
- Before roasting, remove the turkey from the brine and pat it thoroughly dry with paper towels. Discard the used brining solution.
- Proceed with your favorite turkey roasting method. Enjoy your flavorful turkey!
Notes
- Ensure the turkey brine is completely cooled before adding the turkey to prevent cooking the meat.
- Use a food-grade container or brining bag large enough to fully submerge the turkey.
- Do not over-brine the turkey, as it can make the meat too salty or alter its texture. 12-24 hours is ideal for this wet brine for turkey.
- Patting the turkey dry after brining helps achieve crispy skin.
- This recipe is perfect for a Thanksgiving turkey or any holiday turkey.
- Prep Time: 30 minutes
- Cook Time: 0 minutes
- Category: Main Dish
- Method: Brining
- Cuisine: American
Nutrition
- Serving Size: 1 serving (approx. 4 oz cooked turkey)
- Calories: 250
- Sugar: 5g
- Sodium: 600mg
- Fat: 12g
- Saturated Fat: 3g
- Unsaturated Fat: 8g
- Trans Fat: 0g
- Carbohydrates: 6g
- Fiber: 1g
- Protein: 30g
- Cholesterol: 80mg