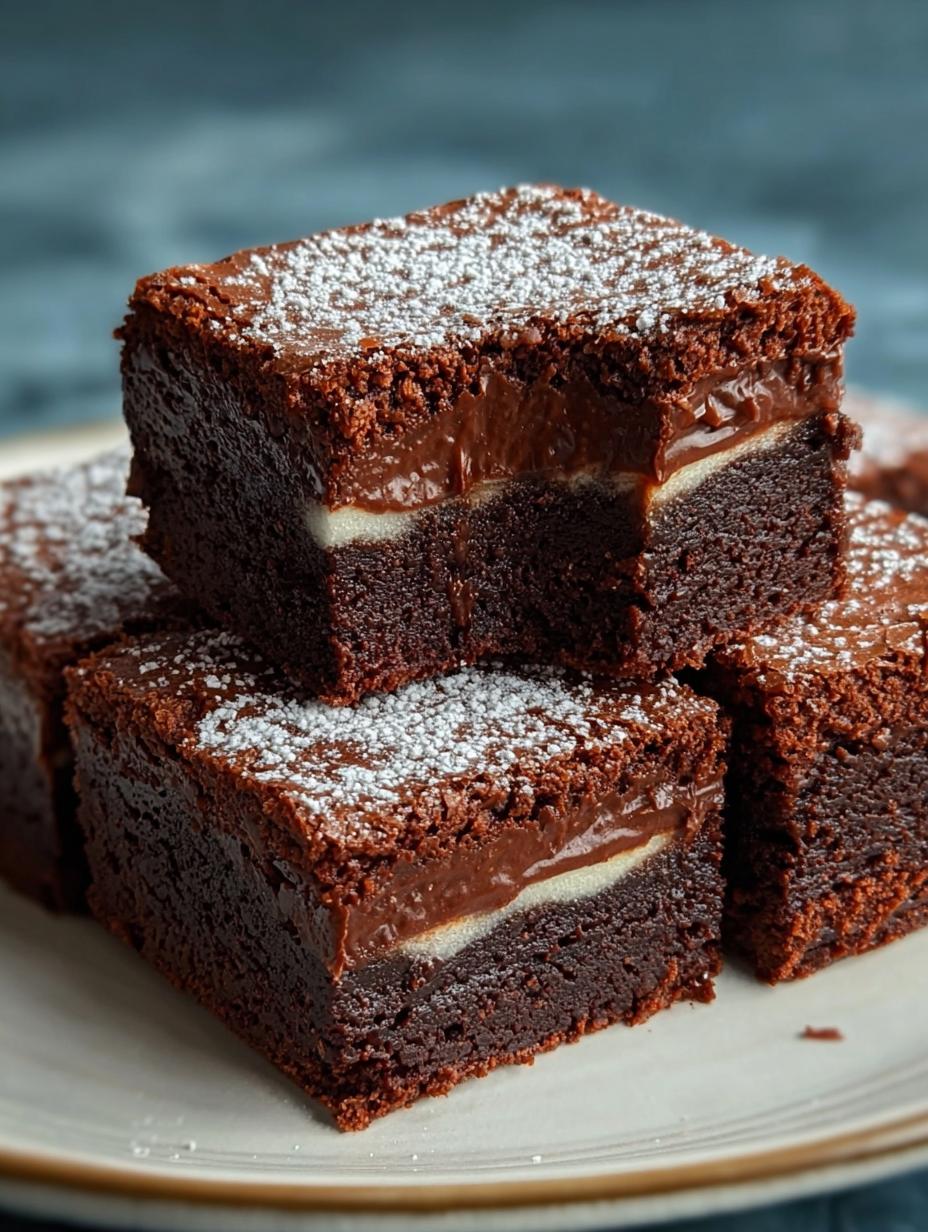
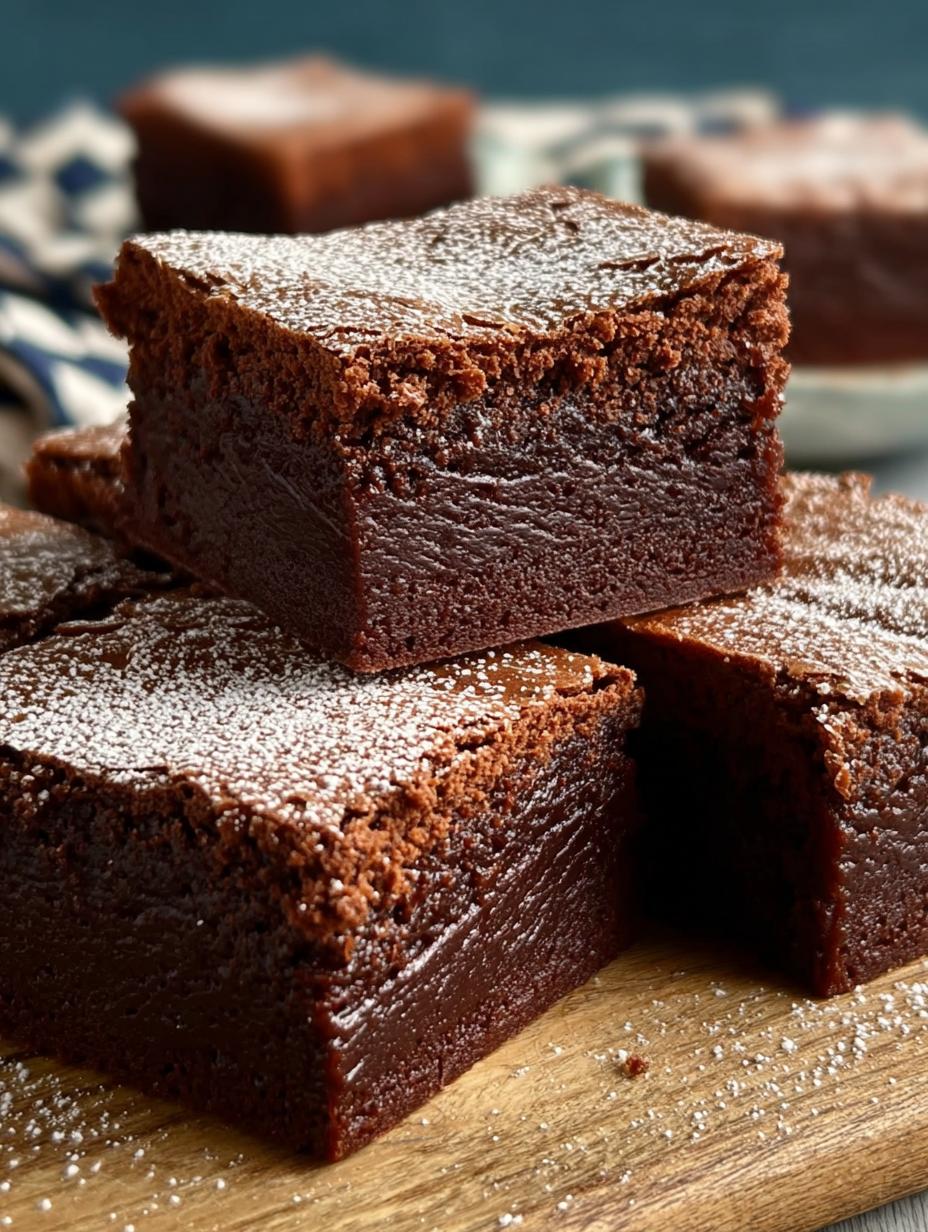
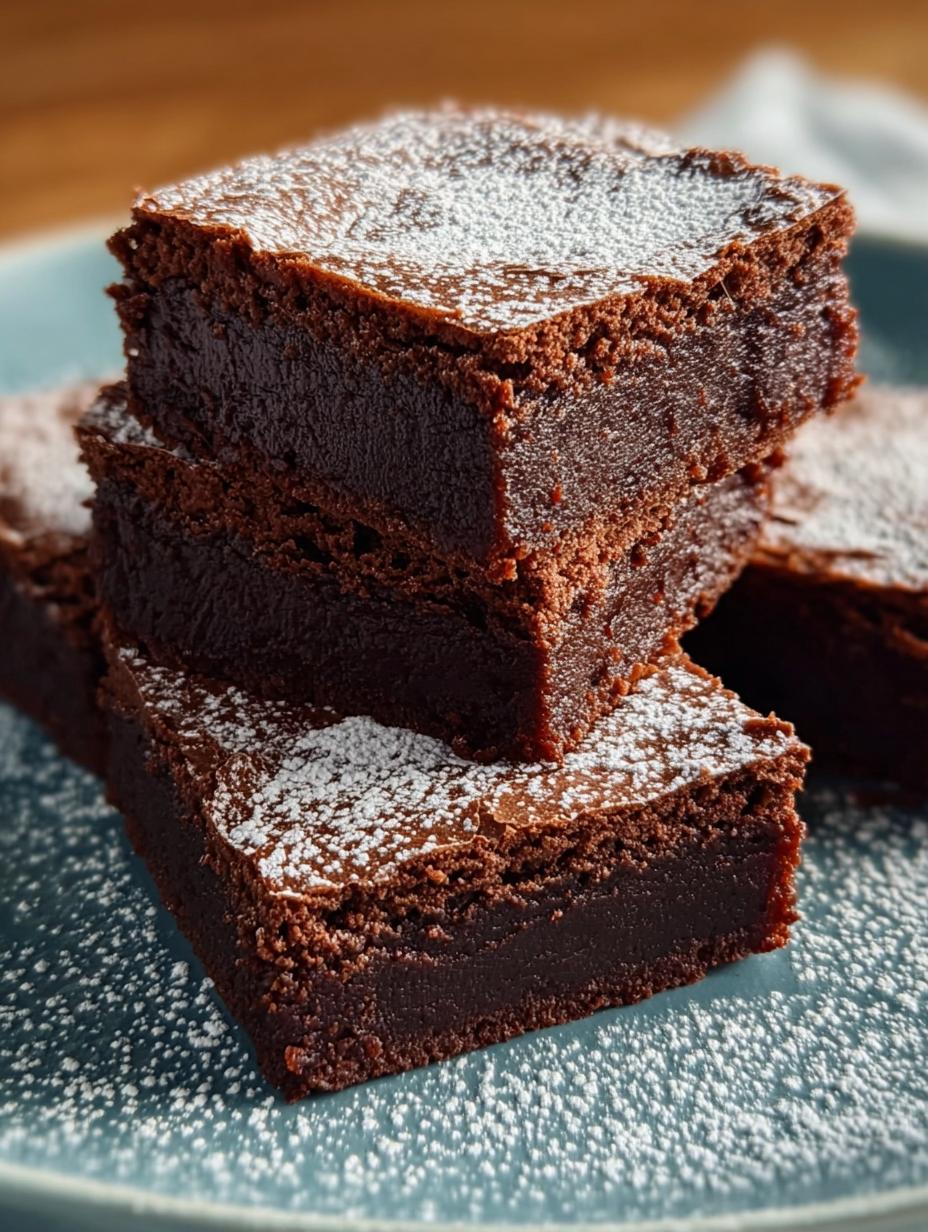
Mochi Brownies have totally revolutionized my dessert game. I still remember the first time I bit into one of these incredibly chewy treats; it was like a fudgy brownie met a perfectly soft mochi, creating a texture explosion I never knew I needed. My kids went absolutely wild for them, and honestly, so did I! These chewy mochi brownies are now a staple in my kitchen, offering that delightful contrast of a crisp top and an irresistibly gooey, stretchy center. This easy homemade mochi brownie recipe is a go-to for family gatherings, always disappearing in minutes. Let’s get cooking!
Why You’ll Love These Mochi Brownies
I’ve discovered so many reasons to adore these incredible mochi brownies, and I know you will too. From their unique texture to their simple preparation, they’re truly a dessert marvel.
- They offer an irresistible combination of rich chocolate flavor and an amazingly chewy, almost bouncy texture that’s unlike any other brownie.
- This is an easy mochi brownies recipe, perfect for even beginner bakers. I promise, you don’t need any special skills!
- They are naturally gluten-free thanks to the mochiko, making them a fantastic treat for those with dietary restrictions.
- Making these at home is far more budget-friendly than buying specialty desserts, and the ingredients are readily available.
- The prep time is minimal, meaning you can whip up a batch of these fudgy delights in under 15 minutes before they hit the oven.
- Everyone, from kids to adults, absolutely adores these. They’re a guaranteed crowd-pleaser for any family gathering or potluck.
- The simple steps make this an easy mochi brownies project for a fun afternoon activity with the family.
Ingredients for Homemade Mochi Brownies
Gathering your ingredients is the first step to creating these delightful treats. I always make sure I have everything ready before I start mixing, it just makes the whole process smoother for these mochi brownies.
- 1 cup (120g) mochiko (glutinous rice flour) – This is the star ingredient! It’s crucial for achieving that characteristic chewy, stretchy texture of mochi.
- 1/2 cup (45g) cocoa powder – Use a good quality unsweetened cocoa powder for a rich, deep chocolate flavor in your mochi brownies.
- 1 cup (200g) sugar – Provides sweetness and helps create that wonderful crispy top crust.
- 1 teaspoon baking powder – Just enough to give a slight lift without losing the dense, fudgy texture.
- 1/4 teaspoon salt – A touch of salt balances the sweetness and enhances all the chocolate notes.
- 1/2 cup (115g) unsalted butter, melted – Melting the butter ensures easy incorporation and a smooth batter.
- 1 1/4 cups (300ml) half-and-half or milk – Adds moisture and binds the ingredients together.
- 2 large eggs – Room temperature eggs mix in more evenly and contribute to the fudgy texture.
- 1 teaspoon vanilla extract – A classic flavor enhancer that complements the chocolate beautifully.
- 1/2 cup chocolate chips or chunks (optional) – For an extra boost of chocolate goodness, I love adding these!
- 1/4 cup chopped nuts (such as walnuts or almonds) (optional) – If you enjoy a bit of crunch, nuts are a great addition to your homemade mochi brownies.
How to Make Mochi Brownies
Making these delightful treats is surprisingly simple, and I’ll walk you through each step to ensure your mochi brownies turn out perfectly fudgy and chewy. Just follow these easy instructions!
- Step 1: First things first, preheat your oven to 350°F (175°C). Then, prepare an 8×8-inch baking pan by lining it with parchment paper. I always leave an overhang on two sides; it makes lifting the cooled brownies out so much easier. Lightly grease the parchment paper to prevent sticking.
- Step 2: In a large mixing bowl, combine the melted butter, sugar, eggs, vanilla extract, and half-and-half (or milk). Whisk these wet ingredients together until the mixture is smooth and creamy. You’ll notice the color become a pale yellow, and it should be well combined before moving on.
- Step 3: In a separate, medium-sized bowl, whisk together the dry ingredients: the mochiko, cocoa powder, baking powder, and salt. Make sure there are no lumps in the cocoa powder for a smooth batter.
- Step 4: Now, gradually add the dry mixture into the wet ingredients. Mix gently with a spatula or whisk until the batter is just combined and looks thick and glossy. Be careful not to overmix, as this can lead to a tougher texture in your finished mochi brownies.
- Step 5: If you’re adding chocolate chips or chopped nuts for extra flavor and texture, now’s the time! Gently fold them into the batter until they are evenly distributed. This step is optional, but I love the extra crunch and chocolate burst.
- Step 6: Pour the batter into your prepared baking pan. Use a spatula to smooth the top evenly. I sometimes tap the pan gently on the counter a few times to release any air bubbles.
- Step 7: Bake for 35–40 minutes, or until the top is set and a toothpick inserted into the center comes out mostly clean, perhaps with a few moist crumbs attached. You don’t want it completely dry, or you risk overbaking. This is crucial for how to make mochi brownies with the perfect texture.
- Step 8: This is perhaps the hardest step – patience! Allow the mochi brownies to cool completely in the pan on a wire rack before attempting to cut them. Mochi-based desserts firm up and develop their signature chewiness as they cool. Trust me, waiting is worth it for perfectly clean slices.
Pro Tips for the Best Mochi Brownies
I’ve baked countless batches of these delightful treats, and along the way, I’ve picked up a few tricks to ensure your mochi brownies are absolutely perfect every time. These expert tips will help you achieve that ideal fudgy, chewy consistency.
- Always use good quality mochiko (glutinous rice flour). It’s the foundation of that unique chewy texture, so don’t substitute it with regular rice flour.
- Avoid overmixing the batter once the dry ingredients are added. Overmixing can develop the glutinous rice flour too much, leading to a tougher brownie rather than a tender, chewy one.
- Don’t overbake! A slightly underbaked brownie will be fudgier and chewier. The edges should be set, but the center might still look a little soft.
- Let your mochi brownies cool completely in the pan before slicing. This is crucial for them to set properly and for clean, beautiful cuts.
What’s the secret to perfectly chewy Mochi Brownies?
The secret lies in the glutinous rice flour (mochiko) and not overbaking. Mochiko reacts with moisture and heat to create that signature stretchy, bouncy texture. Baking just until set ensures they stay moist and don’t dry out, which is why these are called chewy mochi brownies.
Can I make Mochi Brownies ahead of time?
Absolutely! You can prepare the batter up to 24 hours in advance and store it covered in the refrigerator. Just give it a good stir before pouring into the pan and baking. Baked mochi brownies also store wonderfully once cooled.
How do I avoid common mistakes with Mochi Brownies?
To avoid common pitfalls, first, ensure you’re using mochiko, not regular rice flour. Second, don’t overmix the batter; mix until just combined. Finally, resist the urge to cut them while warm; patience ensures the perfect chewy texture and clean slices for your mochi brownies.
Best Ways to Serve Mochi Brownies
Once your mochi brownies have cooled to perfection, the fun begins with how to enjoy them! My favorite way is simply as they are, letting that rich chocolate and unique chewy texture shine through. They’re a fantastic standalone treat for any time of day.
For an elevated experience, try serving them slightly warmed with a scoop of vanilla bean ice cream. The contrast of warm, fudgy brownie against cold, creamy ice cream is simply divine. A drizzle of chocolate syrup or a sprinkle of flaky sea salt can add another layer of flavor to this delightful brownie mochi dessert.
These mochi brownies also pair wonderfully with a hot cup of coffee or a cold glass of milk. The slight bitterness of coffee complements the sweetness of the brownie, while milk is a classic comforting companion. However you choose to serve them, these chewy delights are sure to be a hit!
Nutrition Facts for Mochi Brownies
I know many of you are curious about the nutritional breakdown of these delicious treats. Here’s an estimate for one serving of these wonderful mochi brownies, based on the ingredients in this recipe:
- Serving Size: 1 brownie
- Calories: 190
- Fat: 8g
- Saturated Fat: 5g
- Trans Fat: 0g
- Cholesterol: 35mg
- Sodium: 85mg
- Carbohydrates: 27g
- Fiber: 2g
- Sugar: 16g
- Protein: 3g
Nutritional values are estimates and may vary based on specific ingredients used and portion sizes. Enjoy your mochi brownies responsibly!
How to Store and Reheat Mochi Brownies
Once your irresistible mochi brownies have cooled completely, proper storage is key to keeping them fresh and chewy. I always make sure they’re at room temperature before putting them away. This prevents condensation which can make them soggy.
For short-term storage, place your mochi brownies in an airtight container at room temperature for up to 2-3 days, or in the refrigerator for up to 4-5 days. They retain their wonderful texture beautifully!
If you’ve been busy baking mochi brownies at home and made a large batch, you can freeze them! Wrap individual brownies tightly in plastic wrap, then place them in a freezer-safe bag or container. They’ll stay fresh for up to 3 months. When you’re ready for a treat, thaw them at room temperature or warm them gently in the microwave for 10-15 seconds for that fresh-baked feel.
Frequently Asked Questions About Mochi Brownies
What are Mochi Brownies exactly?
Mochi Brownies are a delightful fusion dessert that combines the rich, fudgy taste of a classic chocolate brownie with the unique, chewy, and slightly elastic texture of Japanese mochi. They’re typically made with glutinous rice flour (mochiko), which gives them their signature bouncy bite, setting them apart from traditional brownies. I find them incredibly satisfying!
Are Mochi Brownies gluten-free?
Yes, typically, Mochi Brownies are naturally gluten-free because they use mochiko, which is a type of glutinous rice flour, instead of wheat flour. However, it’s always a good idea to double-check all your ingredients, especially if you have a severe gluten allergy, to ensure they haven’t been cross-contaminated or contain hidden gluten.
What makes Mochi Brownies chewy?
The secret to the incredible chewiness of Mochi Brownies lies in the glutinous rice flour, or mochiko. When this special flour is combined with liquids and baked, it develops a unique, stretchy, and elastic texture that’s characteristic of mochi. It’s truly what makes them so addictive and different from regular brownies.
How do Mochi Brownies differ from regular brownies?
The main difference between Mochi Brownies and regular brownies is their texture. Regular brownies are dense and fudgy or cakey, depending on the recipe. Mochi Brownies, on the other hand, have a distinct chewy, almost bouncy, and slightly sticky texture due to the use of glutinous rice flour. This unique mouthfeel is what makes them so special.
Variations of Mochi Brownies You Can Try
One of the things I love most about baking is the endless possibilities for variation, and mochi brownies are no exception! Once you’ve mastered the basic recipe, you can start experimenting with different flavors and dietary adjustments to make them uniquely yours.
- Matcha Mochi Brownies: For a delightful Japanese twist, try adding 1-2 tablespoons of high-quality matcha powder to your dry ingredients. This gives the brownies a beautiful green hue and an earthy, slightly bitter flavor that pairs wonderfully with chocolate.
- Nut-Free Mochi Brownies: If you have allergies or just prefer to omit nuts, simply leave out the chopped nuts. The texture of these gluten-free mochi brownies is already so satisfying, you won’t miss them!
- White Chocolate Raspberry Mochi Brownies: Swirl in some melted white chocolate and fresh or frozen raspberries (no need to thaw) into the batter before baking. The tartness of the raspberries cuts through the sweetness beautifully.
- Espresso Mochi Brownies: Add 1 teaspoon of instant espresso powder to the cocoa mixture to deepen the chocolate flavor. It won’t make them taste like coffee, but it will enhance the richness of your mochi brownies significantly.
Amazing Mochi Brownies: A 1-of-a-Kind Chewy Delight
- Total Time: 55 minutes
- Yield: 16 brownies 1x
- Diet: Gluten Free
Description
Mochi Brownies are a delicious blend of classic chocolate brownies and Japanese mochi. They are chewy, fudgy, and intensely chocolatey. Made with glutinous rice flour, these brownies are naturally gluten-free and have a unique stretchy texture that sets them apart from traditional brownies. This easy recipe is budget-friendly and perfect for any dessert occasion.
Ingredients
- 1 cup (120g) mochiko (glutinous rice flour)
- 1/2 cup (45g) cocoa powder
- 1 cup (200g) sugar
- 1 teaspoon baking powder
- 1/4 teaspoon salt
- 1/2 cup (115g) unsalted butter, melted
- 1 1/4 cups (300ml) half-and-half or milk
- 2 large eggs
- 1 teaspoon vanilla extract
- 1/2 cup chocolate chips or chunks (optional)
- 1/4 cup chopped nuts (such as walnuts or almonds) (optional)
Instructions
- Preheat your oven to 350°F (175°C). Line an 8×8-inch baking pan with parchment paper and lightly grease it.
- In a large bowl, whisk together the melted butter, sugar, eggs, vanilla, and half-and-half (or milk) until smooth and creamy.
- In a separate bowl, combine the mochiko, cocoa powder, baking powder, and salt. Gradually fold the dry mixture into the wet ingredients until the batter is thick and glossy.
- If using, fold in the chocolate chips or nuts. Pour the batter into the prepared pan and smooth the top with a spatula.
- Bake for 35–40 minutes, or until the top is set and a toothpick inserted in the center comes out mostly clean.
- Allow the mochi brownies to cool completely before cutting. Mochi-based desserts firm up as they cool, giving them their characteristic chewiness.
Notes
- Use only glutinous rice flour (mochiko) for the correct chewy texture.
- Avoid overbaking to keep the brownies moist and fudgy.
- Let the brownies cool completely before slicing for clean cuts.
- Mix the batter just until combined to prevent air bubbles.
- Store these chewy mochi brownies in an airtight container to maintain their softness and freshness.
- Prep Time: 15 minutes
- Cook Time: 40 minutes
- Category: Dessert
- Method: Baked
- Cuisine: Japanese-American
Nutrition
- Serving Size: 1 brownie
- Calories: 190
- Sugar: 16g
- Sodium: 85mg
- Fat: 8g
- Saturated Fat: 5g
- Unsaturated Fat: 2g
- Trans Fat: 0g
- Carbohydrates: 27g
- Fiber: 2g
- Protein: 3g
- Cholesterol: 35mg