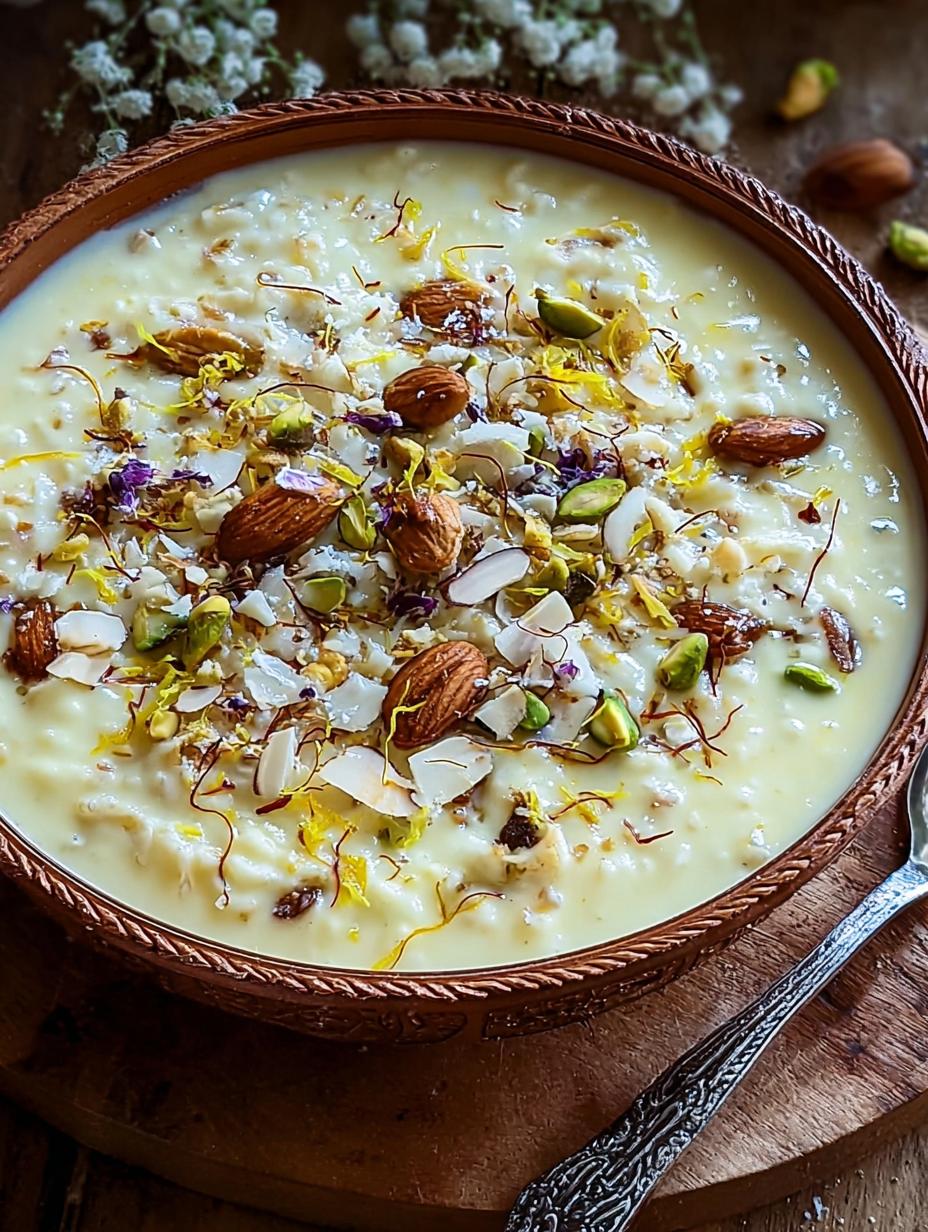
Creamy Kheer has been a staple in my family for generations, a dessert that whispers tales of comfort and celebration. I remember my *Dadi* (grandmother) spending hours by the stove, the sweet aroma of simmering milk and cardamom filling our home. This isn’t just any rice pudding; it’s a labor of love, a thick, velvety embrace of flavors that instantly transports me back to those cherished moments. The way the saffron threads bloom, turning the milky canvas a soft golden hue, is pure magic. Making this Indian rice pudding recipe is more than just cooking; it’s about recreating that warmth and nostalgia. Let’s get cooking!
Why You’ll Love This Creamy Kheer
Get ready to fall in love with this incredibly satisfying dessert. It’s more than just a sweet treat; it’s an experience!
- Unbelievably Creamy Texture: Thanks to the full-fat milk and careful simmering, you’ll achieve that perfect, velvety consistency every time.
- Effortless Preparation: While it requires patience, the steps are straightforward, making it an accessible dessert for any home cook.
- A Taste of Tradition: This Indian rice pudding recipe is a classic for a reason, bringing authentic flavors to your table.
- Versatile Serving: Enjoy it warm and comforting on a cool evening or chilled and refreshing on a hot day.
- Customizable Sweetness: You can easily adjust the sugar to your personal preference, ensuring it’s perfectly sweet for everyone.
- Festive and Special: It’s the ideal dessert for festivals, holidays, or whenever you want to impress guests with a delicious homemade treat.
- Deeply Satisfying: This rich kheer recipe is pure comfort food that warms the soul.
Ingredients for Creamy Kheer
Crafting this authentic Indian rice pudding recipe is a joy, and here’s exactly what you’ll need to create that perfect, velvety texture. Using the right ingredients makes all the difference in achieving that rich, comforting flavor my family adores.
- 1/2 cup basmati rice – Rinse it well until the water is clear, then soak for about 30 minutes. This helps the grains cook evenly and become wonderfully soft.
- 1 liter (4 cups) full-fat milk – This is key for that luscious, creamy consistency and rich flavor. Don’t skimp here!
- 1/2 cup sugar – Adjust this to your personal preference. I usually start with this amount and add a little more if needed towards the end.
- 2 tablespoons ghee (clarified butter) – Ghee adds a subtle nutty aroma and richness that’s characteristic of traditional Indian desserts. For more on ghee, you can check out this explanation.
- 1/4 teaspoon cardamom powder – This fragrant spice is essential for that classic kheer flavor.
- 8 – 10 saffron strands (optional) – For a beautiful golden hue and a delicate aroma, steep these in a tablespoon of warm milk before adding.
- 2 tablespoons chopped almonds – Adds a lovely crunch and nutty flavor.
- 2 tablespoons chopped cashews – Complements the almonds with their own unique taste and texture.
- 1 tablespoon raisins – These plump up beautifully as they cook, adding little bursts of sweetness.
- 2 tablespoons condensed milk (optional, for extra creaminess) – If you want an unbelievably rich and thick kheer, a little condensed milk works wonders.
- A pinch of nutmeg (optional, for depth of flavor) – Just a tiny bit adds a wonderful warmth.
- A few drops of rose water or kewra water (optional, for fragrance) – These floral waters add an exotic perfume that’s divine.
How to Make Creamy Kheer
Making this traditional Indian dessert is a labor of love, but don’t worry if you haven’t made it before. The steps are straightforward, and I’ll guide you through achieving that perfect, velvety texture. This recipe focuses on slow cooking to coax out the best flavors and creaminess.
- Step 1: Rinse your basmati rice under cold water until the water runs clear. This removes excess starch, which is crucial for preventing a gummy kheer. Once rinsed, soak the rice in about 2 cups of water for 20–30 minutes. This step helps the grains cook evenly and become wonderfully soft, contributing to a smoother kheer.
- Step 2: While the rice soaks, pour the full-fat milk into a heavy-bottomed saucepan. I always recommend a heavy-bottomed pot to prevent the milk from scorching. Bring the milk to a gentle boil over medium heat, stirring constantly to avoid sticking. Once it reaches a boil, reduce the heat to low.
- Step 3: Drain the soaked rice completely. Carefully add the drained rice to the simmering milk. Now, the most important part: reduce the heat to low and let it simmer gently for about 35–40 minutes. You’ll need to stir very frequently, scraping the bottom and sides of the pan, to prevent the rice from sticking and the milk from burning. You’ll notice the milk starting to thicken and the rice grains softening beautifully.
- Step 4: Once the rice is tender and the milk has reduced and thickened, it’s time to sweeten and flavor your kheer. Stir in the sugar, cardamom powder, and saffron strands (if using). Continue to cook for another 5–10 minutes, stirring often, until the sugar is dissolved and the kheer has reached your desired consistency. It should coat the back of a spoon – a sign of a beautifully thick kheer.
- Step 5: In a small separate pan, heat the ghee over medium heat. Add the chopped almonds, cashews, and raisins. Roast them gently until the nuts are golden brown and the raisins are plump. Be careful not to burn them! Pour this fragrant nutty mixture into the simmering kheer and give it a final, good stir.
- Step 6: Remove the kheer from the heat. If you’re using condensed milk, rose water, or nutmeg, stir them in now. Let the kheer rest for about 10 minutes. This allows the flavors to meld and the kheer to thicken slightly more.
Pro Tips for the Best Creamy Kheer
Achieving that perfect, velvety texture for this traditional Indian dessert is all about a few key techniques. Follow these tips, and you’ll be serving up a truly decadent kheer every time.
- Always use full-fat milk; it’s non-negotiable for that rich, creamy mouthfeel and deep flavor.
- Rinse and soak your basmati rice properly. This ensures the grains cook evenly and become tender, crucial for a smooth kheer.
- Stir constantly, especially after adding the rice. A heavy-bottomed pot is your best friend here to prevent sticking and burning.
- Don’t rush the simmering process. Low and slow is the way to go for developing that wonderful, thick kheer consistency.
- Add your sweeteners and flavorings towards the end of cooking to prevent the milk from curdling.
What’s the secret to perfect creamy kheer?
The real secret to a perfect, velvety kheer lies in patience and constant stirring. Using full-fat milk and simmering it on low heat allows the milk solids to break down and thicken naturally, creating that luscious texture without needing heavy cream.
Can I make creamy kheer ahead of time?
Absolutely! This sweet rice pudding is fantastic for meal prep. You can make it a day or two in advance and store it in the refrigerator. Its flavor often deepens overnight.
How do I avoid common mistakes with creamy kheer?
The most common pitfalls are burnt milk or a gummy texture. To avoid this, consistently stir your kheer, especially after adding the rice. Also, ensure you use a heavy-bottomed pot and low heat to prevent scorching. For more on food safety and storage, consult FoodSafety.gov.
Best Ways to Serve Creamy Kheer
This delightful Indian rice pudding is wonderfully versatile, perfect for so many occasions. I love serving it warm on a chilly evening for ultimate comfort, or chilled on a hot day for a refreshing treat. It’s a standout dessert on its own, but you can also pair it with a light meal. For a truly authentic experience, serve it after a spicy curry or a flavorful biryani – the sweetness beautifully balances the savory notes. A sprinkle of fresh pomegranate seeds or a few extra chopped nuts also adds a lovely pop of color and texture to this already delicious dessert.
Nutrition Facts for Creamy Kheer
This rich and comforting Indian dessert is a delightful treat! Here’s a breakdown of the approximate nutritional values per serving of this Indian rice pudding recipe. Remember, these are estimates and can vary based on your specific ingredients and portion sizes.
- Serving Size: 1 bowl
- Calories: 310
- Fat: 14g
- Saturated Fat: 8g
- Protein: 8g
- Carbohydrates: 38g
- Fiber: 1g
- Sugar: 28g
- Sodium: 90mg
Nutritional values are estimates and may vary based on specific ingredients used. For detailed nutritional information, consult a registered dietitian or use a reliable nutrition calculator like those found on MyFitnessPal.
How to Store and Reheat Creamy Kheer
Properly storing your delicious Indian rice pudding ensures you can enjoy its comforting flavors for days to come. Once your kheer has cooled down to room temperature – never put hot food directly into storage – transfer it into airtight containers. This is crucial for maintaining freshness and preventing any unwanted odors from the refrigerator from seeping in. You can comfortably keep your creamy kheer in the fridge for about 3 to 4 days. For longer storage, freezing is an excellent option. Pack it into freezer-safe containers, leaving a little headspace for expansion, and it will keep well for up to 3 months. When you’re ready to enjoy your stored kheer, the best way to reheat it is gently on the stovetop over low heat, stirring occasionally. You might need to add a splash of milk to reach your desired consistency, bringing back that lovely, smooth texture.
Frequently Asked Questions About Creamy Kheer
Can I make creamy kheer with different types of milk?
While full-fat milk is ideal for achieving that rich, velvety kheer texture, you can experiment with others. Lower-fat milk will result in a less creamy pudding, and non-dairy milks like almond or coconut milk will change the flavor profile significantly but can work for dietary needs.
What can I use if I don’t have basmati rice for this Indian rice pudding recipe?
If you can’t find basmati rice, short-grain rice like Arborio (used for risotto) can work, though it might yield a slightly different texture, often a bit sticker. Just be sure to rinse it well and soak it for a similar amount of time to ensure it cooks evenly.
How do I get my kheer to be thicker if it’s too thin?
If your kheer isn’t as thick as you’d like, don’t worry! You can gently simmer it uncovered for a little longer, stirring frequently, to allow more liquid to evaporate. Alternatively, you can create a slurry with a tablespoon of cornstarch mixed with a little cold milk, then stir it into the simmering kheer until it thickens. This is a great trick for achieving a thick kheer recipe quickly.
Can I make this creamy kheer recipe vegan?
Yes, you absolutely can! To make this a vegan dessert, simply swap the full-fat dairy milk for a rich, unsweetened plant-based milk like cashew or full-fat coconut milk. Use vegan butter or a neutral oil instead of ghee, and omit condensed milk if you were planning to use it. The result will be a delicious, dairy-free take on this classic Indian rice pudding.
Variations of Creamy Kheer You Can Try
While the classic version of this Indian rice pudding is divine, I love experimenting with different flavors and dietary needs. It’s amazing how you can transform this comforting dessert! Here are a few of my favorite ways to mix things up and create a truly unique kheer.
- Vegan Kheer: For a dairy-free delight, swap the full-fat milk for a rich, unsweetened plant-based milk like cashew or coconut milk. Use vegan butter or a neutral oil instead of ghee. This still gives you a wonderfully creamy texture, perfect for everyone to enjoy.
- Chocolate Kheer: Add a spoonful of unsweetened cocoa powder or melted dark chocolate towards the end of cooking. This creates a decadent, rich twist that’s surprisingly delicious and a hit with kids (and adults!).
- Fruit Infused Kheer: Fold in some mashed ripe mango or strawberry puree after the kheer has thickened and cooled slightly. This adds a beautiful fruity sweetness and a lovely vibrant color, turning it into a delightful dessert kheer.
- Oats Kheer: If you’re looking for a quicker or slightly healthier option, try using rolled oats instead of rice. They cook much faster, giving you a lovely thick kheer in a fraction of the time while still offering a comforting, smooth texture.

Creamy Kheer: 1 Pot Comfort Dessert
- Total Time: 55 minutes
- Yield: 4 servings 1x
- Diet: Vegetarian
Description
This Creamy Kheer Recipe delivers India’s cherished dessert—a rich, slow-cooked rice pudding blended with milk, sugar, cardamom, and saffron. It offers a perfect balance of sweetness and spice, served warm or chilled, ideal for festivals, family gatherings, or quiet evenings. A comforting dessert that embodies tradition, warmth, and indulgence in every bite.
Ingredients
- 1/2 cup basmati rice
- 1 liter (4 cups) full-fat milk
- 1/2 cup sugar (adjust to taste)
- 2 tablespoons ghee (clarified butter)
- 1/4 teaspoon cardamom powder
- 8 – 10 saffron strands (optional)
- 2 tablespoons chopped almonds
- 2 tablespoons chopped cashews
- 1 tablespoon raisins
- 2 tablespoons condensed milk (optional, for extra creaminess)
- A pinch of nutmeg (optional, for depth of flavor)
- A few drops of rose water or kewra water (optional, for fragrance)
Instructions
- Wash and Soak the Rice: Rinse basmati rice until the water runs clear. Soak for 20–30 minutes to help it cook evenly.
- Boil the Milk: In a heavy-bottomed saucepan, bring milk to a gentle boil over medium heat, stirring often to prevent sticking.
- Add Rice and Simmer: Drain soaked rice and add it to the milk. Reduce heat and simmer for 35–40 minutes, stirring frequently.
- Sweeten and Flavor: Once rice softens and milk thickens, add sugar, cardamom powder, and saffron. Stir and cook for another 5–10 minutes.
- Roast and Add Nuts: In a small pan, heat ghee and roast almonds, cashews, and raisins until golden. Add them to the kheer and mix well.
- Serve: Enjoy warm for comfort or chill for a refreshing dessert. Garnish with pistachios or rose petals before serving.
Notes
- Use full-fat milk for a rich, creamy texture.
- Soak rice before cooking to ensure smooth, soft grains.
- Add sugar only after rice has softened completely.
- Stir frequently to prevent burning or sticking.
- Garnish with nuts and saffron just before serving for the best flavor.
- Prep Time: 10 minutes
- Cook Time: 45 minutes
- Category: Dessert
- Method: Stovetop
- Cuisine: Indian
Nutrition
- Serving Size: 1 bowl
- Calories: 310
- Sugar: 28g
- Sodium: 90mg
- Fat: 14g
- Saturated Fat: 8g
- Unsaturated Fat: 5g
- Trans Fat: 0g
- Carbohydrates: 38g
- Fiber: 1g
- Protein: 8g
- Cholesterol: 35mg