Spooky grilled cheese has become my absolute favorite way to celebrate Halloween with my family. I remember one year, I wanted to make lunchtime extra special for my kids, and this simple twist on a classic grilled cheese was a huge hit! The smell of the toasting bread and melty cheese, combined with the fun Halloween shapes cut out, just screams festive. It’s such an easy spooky grilled cheese to whip up, perfect for a quick lunch or a fun party snack. You won’t believe how excited everyone gets for this Halloween grilled cheese. Let’s get cooking!
Why You’ll Love This Spooky Grilled Cheese
- An incredibly delicious taste with perfectly melted cheese and golden-brown bread.
- Super quick prep time, making it ideal for busy parents and last-minute Halloween treats.
- A fun and playful way to incorporate a festive theme into meals, perfect for a ghost grilled cheese sandwich.
- Budget-friendly ingredients mean you can make a whole batch without breaking the bank.
- A guaranteed hit with kids, turning any meal into a memorable Halloween experience.
- It’s a simple yet impressive way to serve a crowd, offering a delightful ghost grilled cheese sandwich.
- Versatile enough to be a light lunch, a fun snack, or part of a larger Halloween party spread.
Ingredients for Spooky Grilled Cheese
Here’s what you’ll need to create this fun monster grilled cheese recipe:
- 2 slices of your favorite bread – I love using a soft white or sourdough for this.
- 2 slices of cheese – Cheddar or American cheese melts beautifully and gives that classic grilled cheese flavor.
- 1 tablespoon butter – Softened is easiest to spread for an even golden crust.
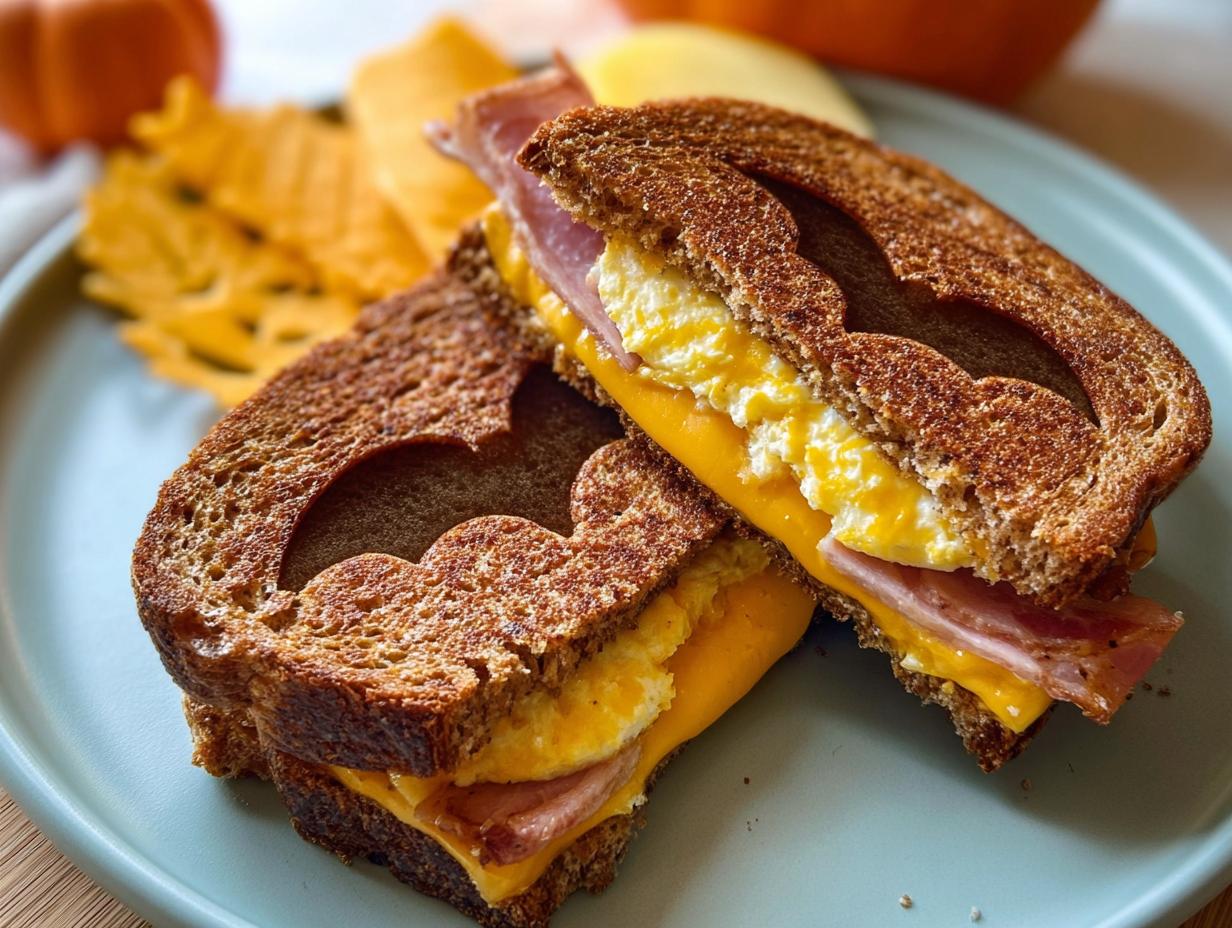
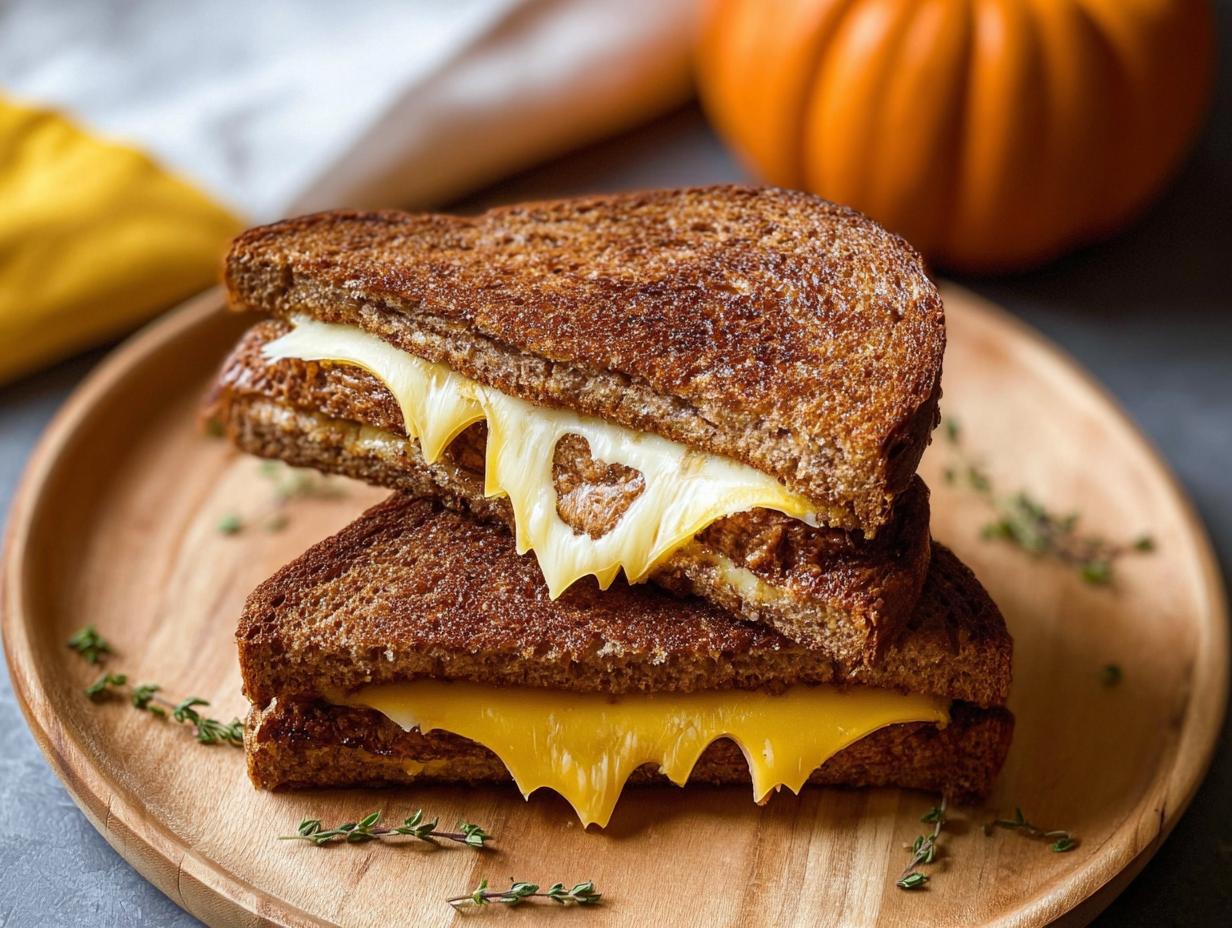
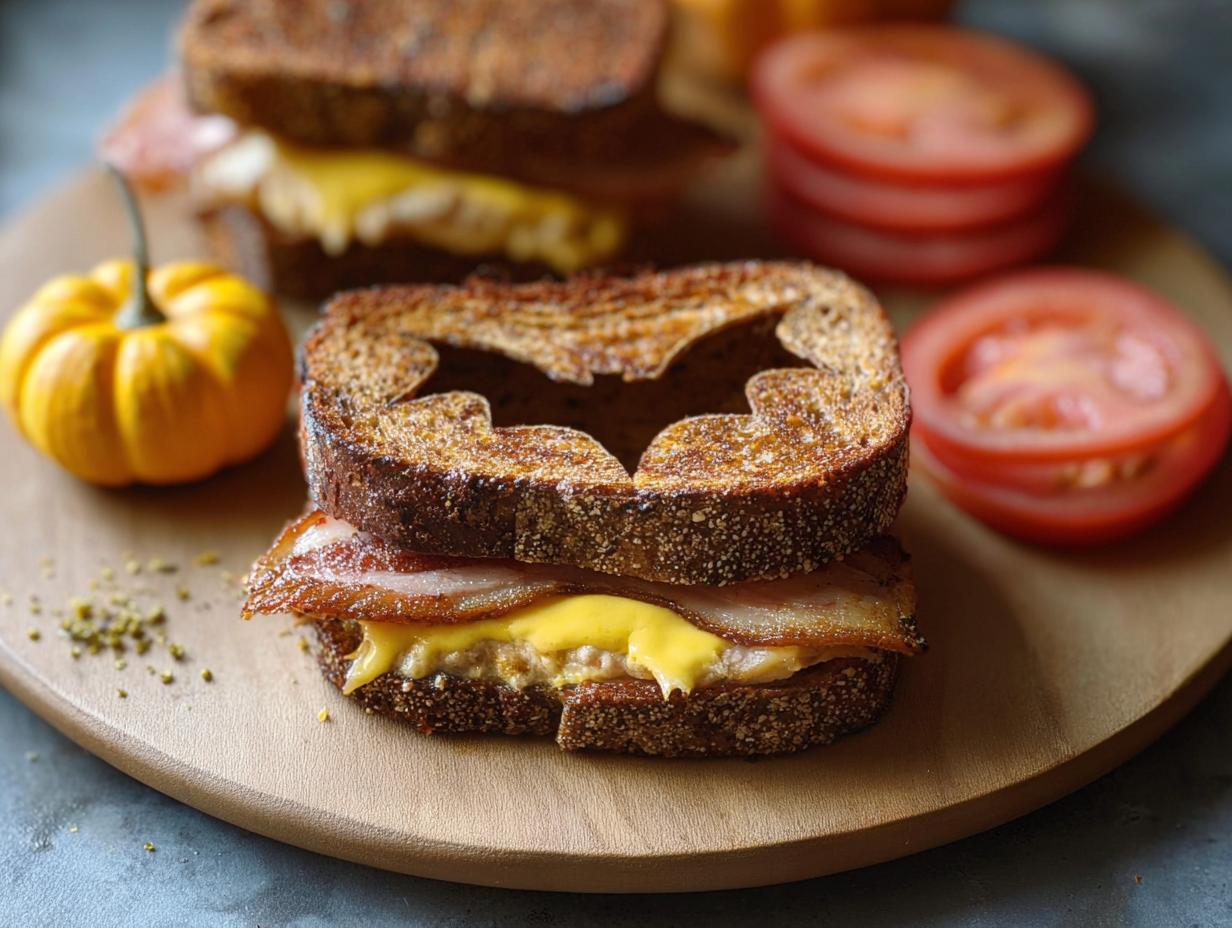
- Cookie cutters in Halloween shapes – Think ghosts, pumpkins, bats, or stars! These are key to the spooky look.
The butter is essential for achieving that perfect golden-brown crispiness on the outside of the bread. Using a good melting cheese ensures a gooey, delightful center, making this a truly satisfying sandwich. The Halloween cookie cutters are what transform a simple grilled cheese into a festive treat!
How to Make Spooky Grilled Cheese
- Step 1: Let’s get started on how to make spooky grilled cheese! First, preheat your skillet or griddle over medium heat. You want it warm enough to toast the bread nicely without burning it.
- Step 2: Take one slice of bread and spread about half of the butter evenly over one side. This is the side that will be the bottom of your sandwich.
- Step 3: Place that buttered slice, butter-side down, into the warm skillet. You should hear a gentle sizzle – that’s the sound of deliciousness starting!
- Step 4: Now, it’s time for the cheese! Layer your two slices of cheese directly onto the bread in the skillet. Make sure they cover the surface well for maximum gooeyness.
- Step 5: Grab your second slice of bread. Spread the remaining butter on one side of this slice. This buttered side will be the top of your sandwich.
- Step 6: Using your Halloween cookie cutter, carefully press down and cut a shape out of the center of this second slice of bread. This is the “spooky” element!
- Step 7: Gently place this second slice of bread, butter-side up, on top of the cheese. The cut-out shape should be facing upwards, revealing the cheese beneath.
- Step 8: Grill for about 2-3 minutes per side. Keep an eye on it; you’re looking for a beautiful golden-brown crust on both sides of the bread and that moment when the cheese is perfectly melted and oozing out. This is a key part of how to make spooky grilled cheese truly amazing.
- Step 9: Once golden and gooey, carefully slide your spooky grilled cheese sandwich onto a plate.
- Step 10: Serve your creation immediately while it’s warm and the cheese is perfectly melty. Enjoy this fun Halloween grilled cheese!
Pro Tips for the Best Spooky Grilled Cheese
Here are a few tricks I’ve picked up to make your spooky grilled cheese sandwiches absolutely perfect every time:
- Use softened butter for easy spreading and an even golden crust.
- Don’t overcrowd the pan; cook one sandwich at a time for the best results.
- Experiment with different cheese combinations for a unique flavor profile.
- Ensure your cookie cutters are clean and dry before cutting the bread.
What’s the secret to perfect Spooky Grilled Cheese?
The real secret to a perfect spooky grilled cheese is the medium heat. It allows the bread to toast to a beautiful golden brown while giving the cheese ample time to become wonderfully gooey and melted throughout. This method ensures a fantastic texture and flavor for the best spooky grilled cheese recipe. For more tips on achieving the perfect grilled cheese, check out this guide to making the perfect grilled cheese.
Can I make Spooky Grilled Cheese ahead of time?
While it’s best enjoyed fresh, you can assemble the sandwich (bread, cheese, cut-out bread) up to an hour before cooking. Keep it covered at room temperature. This makes assembling them for a party or lunchbox a breeze! You can find more party planning tips on our site.
How do I avoid common mistakes with Spooky Grilled Cheese?
A common mistake is using heat that’s too high, which burns the bread before the cheese melts. Also, don’t overfill with cheese, as it can ooze out too much. Lastly, ensure your cookie cutter is sharp enough to cleanly cut the bread without tearing. For more information on kitchen safety, you can refer to Red Cross kitchen safety guidelines.
Best Ways to Serve Spooky Grilled Cheese
This fun sandwich is fantastic on its own, but I love pairing it with some simple sides to make it a complete meal. For a truly festive spread, consider serving your spooky grilled cheese alongside a creamy tomato soup – the warmth and richness are a perfect contrast. Another idea is to serve it with a side of crunchy carrot sticks or apple slices for a healthier balance. If you’re looking for more creative Halloween cheese toast ideas, try cutting out shapes from both slices of bread, or even adding a sprinkle of paprika or garlic powder to the buttered bread before grilling for an extra flavor boost. It’s a delightful addition to any fun Halloween lunch ideas spread! You can find more recipe ideas here.
Nutrition Facts for Spooky Grilled Cheese
Here’s a breakdown of the nutritional information for one serving of this fun Halloween treat:
- Calories: 350 kcal
- Fat: 20g
- Saturated Fat: 10g
- Unsaturated Fat: 10g
- Trans Fat: 0g
- Carbohydrates: 25g
- Fiber: 1g
- Sugar: 3g
- Protein: 15g
- Sodium: 600mg
- Cholesterol: 50mg
Nutritional values are estimates and may vary based on specific ingredients used, especially the type of bread and cheese. For more details on nutritional tracking, you can visit MyFitnessPal.
How to Store and Reheat Spooky Grilled Cheese
Once your spooky grilled cheese has cooled slightly, you can store any leftovers for later. For short-term storage, wrap individual sandwiches tightly in plastic wrap or place them in an airtight container. They’ll stay fresh in the refrigerator for about 3-4 days, making them a convenient option for future meals. If you want to keep them even longer, you can freeze them for up to 3 months. This is a fantastic way to ensure you always have a fun treat ready, especially for those last-minute spooky cheese sandwich for kids lunches. Read our privacy policy for more information on data handling.
Reheating is super simple! For a quick refresh, you can pop them in a toaster oven at 350°F (175°C) for a few minutes until warmed through and crispy again. Alternatively, a skillet over medium-low heat works just as well to bring back that golden-brown crunch. Avoid the microwave, as it can make the bread soggy.
Frequently Asked Questions About Spooky Grilled Cheese
What are the best cheeses for a Spooky Grilled Cheese?
I find that classic cheddar or American cheese melts the best, giving you that wonderfully gooey center that kids love. However, feel free to experiment! Monterey Jack, Provolone, or even a mild Swiss can add a fun twist to your Halloween themed grilled cheese for kids. Learn more about our favorite cheese pairings.
Can I make the spooky shapes ahead of time?
Yes, you can! If you’re preparing these for a party or as part of your fun Halloween lunch ideas, you can cut the shapes out of the bread slices a few hours in advance. Just keep the cut-out bread covered with a damp paper towel and the rest of the sandwich components separate until you’re ready to cook.
How do I make the bread extra crispy?
For an extra crispy exterior, try spreading a thin layer of mayonnaise on the outside of the bread instead of butter. It browns beautifully and adds a subtle tang that complements the cheese perfectly. This is one of my favorite tricks for achieving the ultimate texture in any grilled cheese!
What other Halloween shapes can I use besides ghosts and pumpkins?
Get creative! Bats, stars, moons, skulls, or even simple squares and circles can look wonderfully spooky when arranged on a plate. You can also use multiple small cutters to create a pattern on a single slice. It’s all about making these creative Halloween cheese toast ideas fun and personalized! Check out our terms of use for more creative inspiration.
Variations of Spooky Grilled Cheese You Can Try
Once you’ve mastered the basic spooky grilled cheese, why not get a little more adventurous? There are so many fun ways to customize this classic for Halloween. If you’re looking for more themed grilled cheese recipes, consider these ideas:
- Cheesy Monster Mash: Instead of cutting a shape, use edible markers or a small skewer to draw a simple monster face (eyes, mouth) onto the top slice of bread before grilling.
- Ghoulish Garlic Herb: Mix a little garlic powder and dried herbs like parsley or chives into the softened butter before spreading it on the bread. This adds an extra layer of flavor that’s surprisingly delicious.
- Dairy-Free Delight: Use your favorite dairy-free cheese slices and a plant-based butter or a thin layer of vegan mayo for the outside of the bread. It’s just as tasty and caters to dietary needs.
- Bake It Spooky: Prefer not to use the stovetop? Assemble your sandwich as usual and bake it on a parchment-lined baking sheet at 375°F (190°C) for about 8-10 minutes, flipping halfway, until golden and melty.

Spooky Grilled Cheese: 10 Amazing Tricks
- Total Time: 11-13 minutes
- Yield: 1 serving 1x
- Diet: Vegetarian
Description
A fun and festive twist on classic grilled cheese, this Spooky Grilled Cheese Recipe is simple, quick, and features melty cheese and toasty bread with a Halloween-themed surprise cut in the middle. It’s a playful dish that delights both kids and adults.
Ingredients
- 2 slices bread
- 2 slices cheese (cheddar or American work well)
- 1 tablespoon butter
- Cookie cutters in Halloween shapes (ghost, pumpkin, bat)
Instructions
- Butter one side of each slice of bread.
- Place one slice of bread, butter-side down, in a skillet over medium heat.
- Layer the cheese slices on top of the bread in the skillet.
- Use a Halloween cookie cutter to cut a shape out of the center of the second slice of bread.
- Place the second slice of bread, butter-side up, on top of the cheese, with the cut-out shape facing up.
- Grill for 2-3 minutes per side, or until the bread is golden brown and the cheese is melted and gooey.
- Carefully remove the spooky grilled cheese sandwich from the skillet.
- Serve your spooky cheese sandwich immediately.
Notes
- Experiment with different types of cheese for varied flavors.
- Add a thin layer of mayonnaise to the outside of the bread for extra crispiness.
- Get creative with your cookie cutter shapes for a unique spooky grilled cheese.
- Prep Time: 5 minutes
- Cook Time: 6-8 minutes
- Category: Sandwich
- Method: Grilling
- Cuisine: American
Nutrition
- Serving Size: 1 sandwich
- Calories: 350 kcal
- Sugar: 3g
- Sodium: 600mg
- Fat: 20g
- Saturated Fat: 10g
- Unsaturated Fat: 10g
- Trans Fat: 0g
- Carbohydrates: 25g
- Fiber: 1g
- Protein: 15g
- Cholesterol: 50mg